How to Troubleshoot and Diagnose Starting and Charging Issues in Your Car
Experiencing starting and charging issues in your car can be frustrating, especially when you are unsure of the underlying cause. Learning how to troubleshoot car issues effectively can save you time, money, and the inconvenience of unexpected breakdowns. In this comprehensive guide, we will walk you through the steps to identify and resolve common problems related to starting and charging systems in vehicles.
Understanding the Starting and Charging Systems
To properly diagnose starting and charging issues in your car, it is essential to understand the role of each system and how they work together.
The Starting System
The starting system is responsible for turning your engine on. Key components include:
- Battery: Supplies electrical power to the starter and other systems.
- Starter Motor: Engages with the engine to initiate the combustion process.
- Ignition Switch: Activates the electrical system and the starter motor when the key is turned.
- Wiring and Relays: Facilitate the transfer of power from the battery to the starter motor.
The Charging System
The charging system maintains the battery’s charge and powers the vehicle’s electrical components. Its primary parts are:
- Alternator: Converts mechanical energy into electrical energy to charge the battery.
- Voltage Regulator: Ensures a consistent voltage level to protect the electrical components.
- Battery: Stores the energy supplied by the alternator for future use.
Common Symptoms of Starting and Charging Issues
Before diving into diagnosing starting and charging issues in your car, it helps to recognize the warning signs:
Starting Problems
- Engine fails to turn over.
- Clicking sound when turning the key.
- Dashboard lights dim when attempting to start the car.
- The car starts intermittently.
Charging Problems
- Battery warning light on the dashboard.
- Dimming headlights or interior lights.
- Dead battery after short periods of inactivity.
- Unusual noises from the alternator or engine area.
Tools You Need for Troubleshooting
To troubleshoot car issues effectively, gather the following tools:
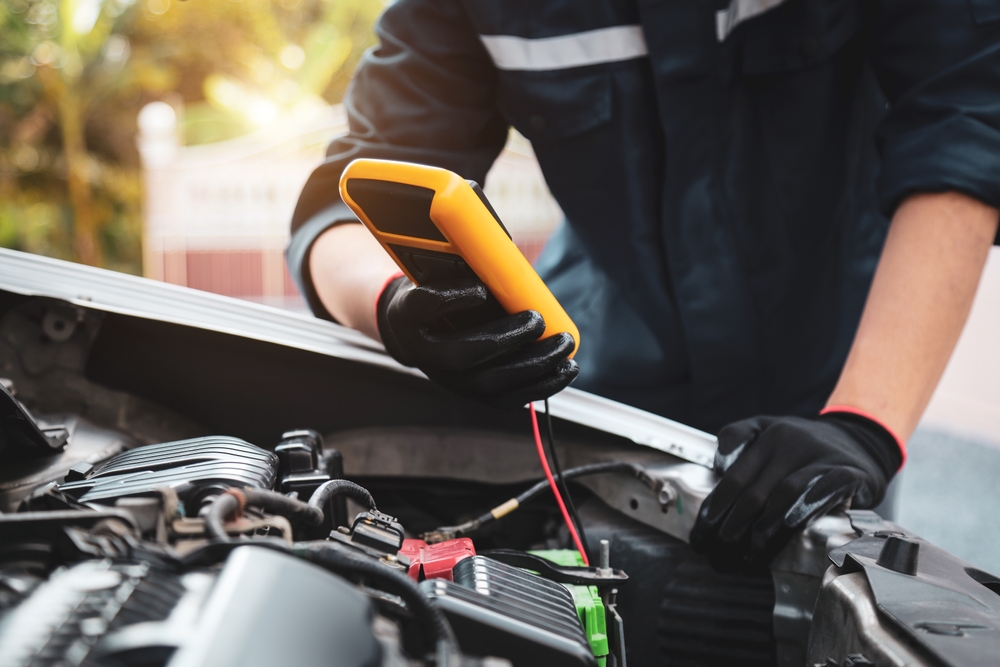
- Multimeter (for voltage testing)
- Wrenches and screwdrivers
- Battery terminal cleaner
- Jumper cables
- Inspection light or flashlight
These tools will help you diagnose the root cause of the problem and take the necessary corrective actions.
Step-by-Step Guide to Diagnosing Starting Issues
Step 1: Inspect the Battery
The battery is often the culprit when starting problems arise. Follow these steps:
- Check Battery Connections: Ensure the terminals are clean and tightly connected. Corrosion can impede power transfer.
- Test Battery Voltage: Use a multimeter to measure the voltage. A fully charged battery should read around 12.6 volts when the engine is off.
- Perform a Load Test: If the voltage is low, test the battery under load to determine if it can hold a charge.
Troubleshooting Results:
- If the voltage is below 12 volts, charge or replace the battery.
- If the battery fails the load test, it is likely faulty.
Step 2: Examine the Starter Motor
If the battery is in good condition, move on to the starter motor.
- Listen for Clicking Sounds: A clicking noise often indicates a problem with the starter or its solenoid.
- Inspect Wiring: Check for loose or damaged wires connected to the starter.
- Test the Starter: Use a jumper wire or remote starter switch to bypass the ignition system. If the starter engages, the issue might lie in the ignition switch or wiring.
Troubleshooting Results:
- Replace the starter if it fails to engage during testing.
- Repair or replace damaged wiring or relays.
Step 3: Check the Ignition System
Problems with the ignition system can also prevent your car from starting.
- Test the Ignition Switch: Use a multimeter to ensure it delivers power when turned.
- Inspect Key and Cylinder: Worn keys or a damaged cylinder can cause ignition failure.
Troubleshooting Results:
- Replace the ignition switch or cylinder as needed.
Step-by-Step Guide to Diagnosing Charging Issues
Step 1: Test the Alternator
The alternator is a common source of charging problems. To check it:
- Measure Alternator Voltage: Use a multimeter with the engine running. A healthy alternator should output between 13.8 and 14.4 volts.
- Inspect the Drive Belt: Ensure the alternator belt is tight and free from cracks or wear.
- Check for Noise: Listen for unusual grinding or whining sounds from the alternator.
Troubleshooting Results:
- Replace the alternator if it fails to provide sufficient voltage or emits unusual noises.
- Tighten or replace the drive belt if necessary.
Step 2: Examine the Voltage Regulator
The voltage regulator controls the alternator’s output. If it malfunctions, the battery may not charge properly.
- Inspect Wiring: Check for loose or corroded connections.
- Test Output Voltage: Compare the alternator’s voltage to the specifications provided by the manufacturer.
Troubleshooting Results:
- Replace the voltage regulator if it delivers inconsistent or excessive voltage.
Step 3: Inspect the Battery Again
Sometimes charging issues stem from a battery that cannot hold a charge, even with a functioning alternator.
- Perform a Long-Term Test: Measure the battery’s voltage over several hours or days.
- Look for Parasitic Drains: Use a multimeter to detect any electrical components that are draining the battery when the car is off.
Troubleshooting Results:
- Replace the battery if it cannot maintain a charge.
- Fix any parasitic drains identified.
Preventative Maintenance Tips
To avoid future starting and charging issues, follow these maintenance tips:
Regular Battery Maintenance
- Clean battery terminals and connections periodically.
- Test battery voltage every three to six months.
- Replace the battery every 3-5 years, depending on usage.
Maintain the Charging System
- Inspect the alternator belt for wear and tension.
- Test the alternator and voltage regulator annually.
- Check electrical connections for signs of corrosion or looseness.
Monitor Electrical Components
- Turn off lights, radio, and other electrical systems when the car is not running.
- Ensure aftermarket accessories are installed correctly and do not drain the battery excessively.
When to Seek Professional Help
If your troubleshooting efforts fail or you encounter complex issues, it is time to seek professional help. Certified mechanics have the expertise and tools to diagnose and resolve problems effectively. Look for an auto repair shop with a good reputation and experience in electrical system repairs.
Final Thoughts
Diagnosing starting and charging issues in your car may seem daunting at first, but with the right tools and knowledge, it becomes manageable. Start with the basics by checking the battery and gradually move through the system components. Regular maintenance and monitoring are key to preventing these issues from arising. By following this guide, you can save time and money while keeping your car in optimal condition.
Need a Mechanic in La Grande, OR?
Our team here at Integrity Automotive has provided quality auto repair services for our customers since 2003. We are a full service auto repair shop and specialize many types of vehicles, including European models such as BMW and Audi, as well as diesel trucks. Our services include engine repair, transmission services, and many more services. Moreover, we are ASE certified and are a proud member of NFIB, and we are a certified NAPA auto care center. Call or come in for immediate service!