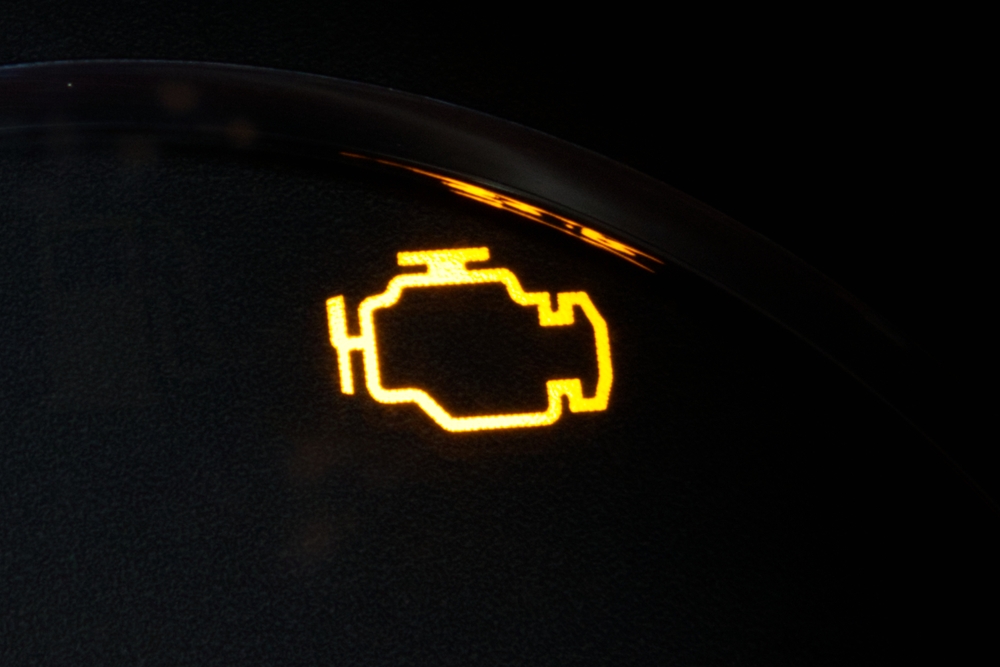
When the check engine light comes on, it can create an immediate sense of worry. Whether you are driving across town or heading out on a long trip through La Grande, OR, that glowing icon on the dashboard is your vehicle’s way of signaling that something needs attention. Sometimes the cause is minor, but in other cases it could point to a serious problem that requires immediate auto repair in La Grande, OR.
This light is part of your car’s onboard diagnostics system. Modern vehicles constantly monitor performance and emissions, and when a sensor detects something unusual, it triggers the check engine light. The system is tied to various components, including the engine, transmission, fuel system, and exhaust. Because the warning covers so many possibilities, the only way to be certain about the issue is through proper engine diagnostics in La Grande.
Many drivers are tempted to ignore the light if the car still feels like it is running smoothly. That decision can turn a small issue into a large, costly repair. By acting promptly, you give a local mechanic in La Grande, Oregon the chance to identify the root cause and prevent further damage.
Common Causes Behind the Light
The check engine light can be triggered by a range of issues, some of which are minor and others more significant. One of the simplest causes is a loose or faulty gas cap. If the cap is not sealing correctly, it can cause the fuel system to lose pressure, which is enough to activate the warning. While this might seem trivial, ignoring it may lead to reduced fuel efficiency over time.
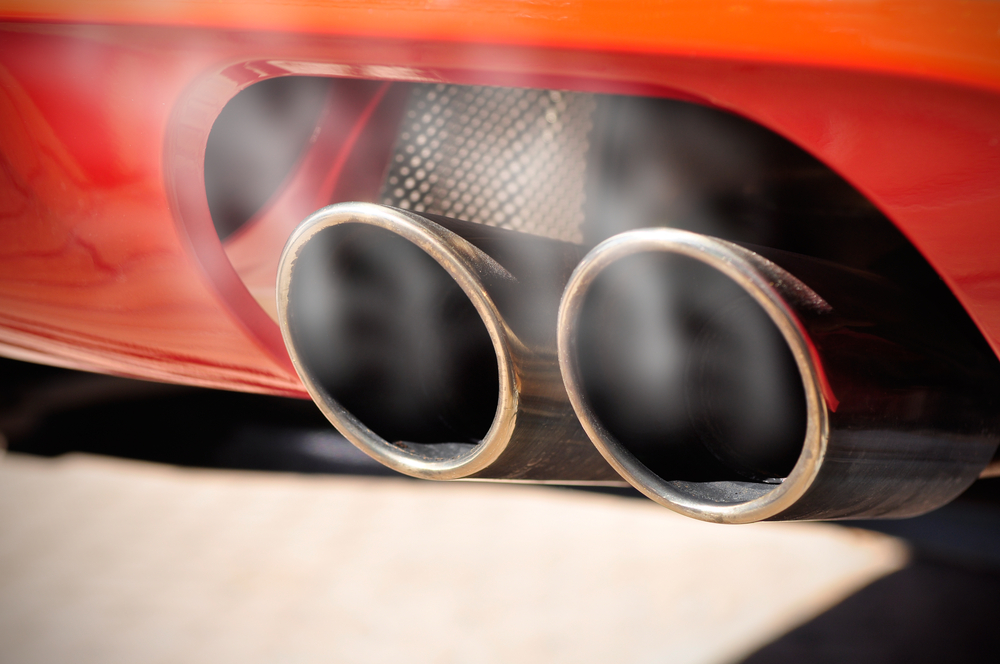
Another frequent reason is a problem with the oxygen sensor. This sensor monitors the amount of oxygen in the exhaust and helps the engine adjust fuel consumption. When it fails, the engine may burn fuel less efficiently, leading to reduced performance and higher emissions. Spark plug or ignition coil failures are also common culprits. These parts play a critical role in igniting the air-fuel mixture, and when they malfunction, your engine may misfire, causing rough running and triggering the light.
Catalytic converter issues can also cause the light to appear. The catalytic converter reduces harmful emissions, and if it is failing, your vehicle could lose power and fuel efficiency while also releasing more pollutants. Other possible triggers include mass airflow sensor problems, wiring faults, or issues with the exhaust gas recirculation system. Because the possibilities are so broad, professional engine diagnostics in La Grande is the most effective way to pinpoint the exact problem.
Why You Shouldn’t Ignore the Warning
Some drivers in La Grande, OR make the mistake of assuming that the check engine light is not urgent. They may put off visiting an auto repair shop until the car shows obvious symptoms like rough idling, stalling, or reduced power. Unfortunately, waiting can turn an inexpensive fix into a major repair bill. For example, replacing a faulty oxygen sensor is relatively affordable, but if the problem is ignored, it can eventually damage the catalytic converter, which is one of the most expensive components of your vehicle’s emissions system.
Ignoring the warning can also reduce fuel economy. A car that is burning more fuel than necessary not only costs more to operate but also puts additional strain on the environment. There is also the safety factor to consider. Problems with ignition coils, spark plugs, or sensors can cause your car to lose power suddenly, which is dangerous if you are driving at highway speeds or navigating mountain roads around La Grande, Oregon.
In addition, vehicles with an active check engine light may fail emissions tests. For drivers in Oregon, this means you may not be able to renew your registration until the issue is resolved. Addressing the problem quickly with the help of a trusted local mechanic in La Grande, Oregon ensures compliance with state requirements and keeps your vehicle running safely and efficiently.
How Mechanics Diagnose the Issue
When you bring your vehicle to a professional for auto repair in La Grande, OR, the first step is engine diagnostics. Modern shops use advanced scan tools that connect to your vehicle’s onboard computer. This allows them to read trouble codes that provide clues about the underlying issue. While the codes narrow down the possibilities, they rarely give a complete answer. That is why experienced technicians also perform additional inspections and tests to confirm the diagnosis.
For example, if the code indicates an oxygen sensor problem, a mechanic will test the sensor’s voltage readings to confirm whether it is truly failing or if the issue is related to wiring or another component. Similarly, if the code points to misfires, the mechanic will check spark plugs, ignition coils, and fuel injectors to determine which part is causing the misfire. This process is essential because replacing parts without proper verification can waste money and still leave the root problem unsolved.
Engine diagnostics in La Grande not only identify the current issue but can also detect developing problems before they cause major breakdowns. By trusting a skilled local mechanic in La Grande, Oregon, you benefit from both immediate solutions and preventative care that extends the life of your vehicle.
Finding the Right Local Mechanic in La Grande, Oregon
When the check engine light comes on, choosing the right repair shop is just as important as acting quickly. Not every shop has the same level of equipment or expertise. A qualified local mechanic in La Grande, Oregon should be equipped with modern diagnostic tools and have experience working on a wide range of makes and models. Look for an auto repair shop that emphasizes transparency. A good mechanic will explain the codes they find, describe what the potential causes are, and outline the repair options in detail.
Customer service also matters. When dealing with something as stressful as engine trouble, it is important to work with a team that communicates clearly and treats your concerns seriously. Local shops often pride themselves on building lasting relationships with drivers in La Grande, OR. This means they are invested in your long-term satisfaction and are more likely to go the extra mile to ensure your vehicle is reliable.
Word of mouth and online reviews are helpful resources when choosing a repair shop. Many residents in La Grande prefer working with mechanics who have earned a strong reputation for honesty, timely service, and quality repairs. Once you find a trusted auto repair provider, it is wise to return for regular maintenance as well, since this helps prevent the kind of problems that lead to the check engine light coming on in the first place.
Conclusion
A check engine light can feel like an unwelcome surprise, but it is ultimately a valuable warning system that protects your car and your safety. For drivers in La Grande, OR, addressing the light quickly through proper engine diagnostics is the best way to prevent small issues from becoming major repairs. Whether the cause is as simple as a loose gas cap or as serious as a failing catalytic converter, a skilled local mechanic in La Grande, Oregon has the tools and expertise to identify and resolve the issue.
By paying attention to the warning, scheduling timely auto repair in La Grande, OR, and trusting a reliable professional to guide you through the process, you keep your vehicle efficient, safe, and ready for the road ahead. Acting early not only saves money but also gives you peace of mind knowing that your car is performing at its best.
Need a Mechanic in La Grande, OR?
Our team here at Integrity Automotive has provided quality auto repair services for our customers since 2003. We are a full service auto repair shop and specialize many types of vehicles, including European models such as BMW and Audi, as well as diesel trucks. Our services include engine repair, transmission services, and many more services. Moreover, we are ASE certified and are a proud member of NFIB, and we are a certified NAPA auto care center. Call or come in for immediate service!
Summer in Union County is more than just a change in temperature—it’s a test of your vehicle’s endurance. With long days of driving under the La Grande sun, your car works harder than ever to keep cool and functional. Understanding the essentials of summer car maintenance is critical not just for your safety but also for preserving the long-term health of your vehicle. Whether you’re navigating city streets or planning road trips through Oregon’s beautiful terrain, making sure your car stays cool should be your top priority.
Why Summer Car Maintenance Matters in Union County
Union County’s summer climate can be deceptively harsh on vehicles. While scenic drives and open highways are part of the charm of living in La Grande, the elevated temperatures, combined with mountainous terrain, place significant stress on engines, cooling systems, and tires. Summer car maintenance isn’t just about convenience; it’s about avoiding the real risk of breakdowns and costly repairs.
A vehicle that overheats on a quiet backroad can quickly escalate into a major inconvenience or even a safety issue. Regular maintenance helps prevent these emergencies, saving you time, money, and stress. Preventative care is especially important for Union County residents who rely on their cars for daily commutes, business operations, or weekend escapes into Oregon’s outdoors.
How to Prevent Car from Overheating This Summer
The most common summer vehicle issue drivers in Union County face is overheating. But how to prevent car from overheating isn’t a mystery—it’s about proactive care and attention. First, make sure your coolant system is fully functional. Your car’s radiator and coolant system are responsible for regulating engine temperature. Coolant levels should be checked regularly, and old coolant needs to be flushed and replaced according to manufacturer guidelines.
Belts and hoses must also be inspected. Over time, these rubber components can crack or wear down, especially under the strain of summer heat. If a hose leaks or a belt breaks, your engine’s cooling system could fail instantly, leading to overheating.
A properly functioning thermostat is equally critical. This device controls the flow of coolant through the engine. If it’s stuck closed or not operating properly, your engine can overheat even if coolant levels appear normal.
Finally, never underestimate the importance of your vehicle’s radiator fan. This fan helps pull cooler air through the radiator when the car isn’t moving fast enough to cool itself naturally. If your fan stops working—whether due to an electrical fault or motor failure—your vehicle will likely overheat when idling or in slow traffic.
Keep Your Air Conditioning Ready: Car AC Repair in La Grande, OR
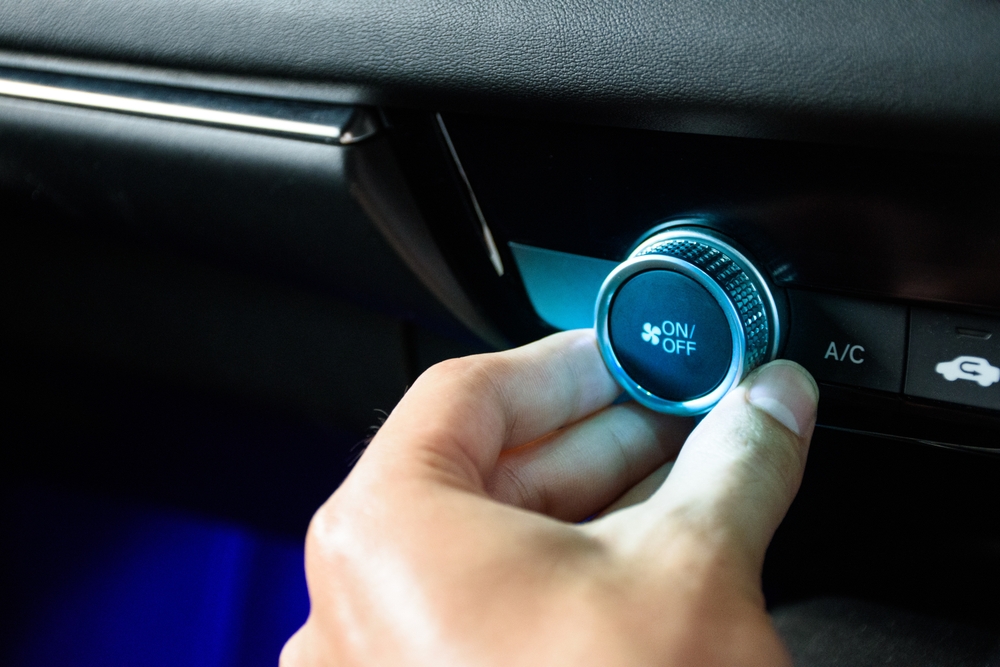
In Union County, staying comfortable during your summer drives is just as important as keeping your engine cool. If your air conditioning isn’t working at peak performance, it’s time to consider professional car AC repair in La Grande, OR. A functional AC system isn’t merely a luxury—it plays a role in your overall driving safety and comfort.
Your vehicle’s AC system relies on a network of components, including compressors, condensers, and refrigerants. Over time, refrigerant levels can deplete, or the compressor might wear out. Both issues lead to a gradual decline in cooling performance. If you notice weaker airflow or warmer air blowing from your vents, these are signs that your AC system needs attention.
Professional mechanics in La Grande can recharge your refrigerant, inspect your compressor, and replace any faulty components. Prompt AC repair ensures you won’t have to suffer through uncomfortably hot rides this summer and helps prevent more expensive system failures down the line. Proper AC maintenance also improves fuel efficiency—when your system is running optimally, your engine doesn’t have to work as hard to power the air conditioning.
Local Solutions: Finding Reliable Auto Repair in La Grande
When your vehicle needs attention, finding dependable service is key. Fortunately, residents of Union County have access to a range of high-quality La Grande auto repair shops that specialize in summer car maintenance. Choosing a local mechanic isn’t just about convenience—it means you’re working with professionals who understand the specific challenges that Union County’s climate and geography pose to vehicles.
Look for repair shops that offer comprehensive diagnostics and have experience dealing with cooling systems, AC repairs, and engine care. Transparency is critical, so seek out auto repair businesses that explain recommended services clearly and provide fair estimates upfront.
Building a relationship with a trusted La Grande auto repair provider pays off in the long run. Regular check-ups ensure your car stays in peak condition, and having a go-to service team means faster assistance when urgent repairs are needed. Local mechanics often offer seasonal maintenance packages tailored to address the most common summer vehicle issues, making it easier for you to keep your car cool and functional throughout the hotter months.
Drive Cool and Safe: Preparing for Union County’s Summer Roads
Keeping your car running cool during Union County’s summers is about preparation and vigilance. From understanding how to prevent car from overheating to ensuring timely car AC repair in La Grande, OR, every maintenance step contributes to a safer and more comfortable driving experience.
Don’t wait for signs of trouble to appear. Embrace proactive summer car maintenance as a non-negotiable aspect of vehicle ownership. Monitor your coolant system, replace worn belts and hoses, and have your AC system checked regularly. By partnering with reliable La Grande auto repair professionals, you’ll drive with confidence through the summer heat, knowing your car is equipped to handle whatever the roads throw your way.
Summer in Union County is meant to be enjoyed. Whether you’re exploring the Wallowa Mountains or simply running errands around La Grande, make sure your vehicle is ready to perform. After all, nothing should stand between you and a cool, comfortable summer drive.
Need a Mechanic in La Grande, OR?
Our team here at Integrity Automotive has provided quality auto repair services for our customers since 2003. We are a full service auto repair shop and specialize many types of vehicles, including European models such as BMW and Audi, as well as diesel trucks. Our services include engine repair, transmission services, and many more services. Moreover, we are ASE certified and are a proud member of NFIB, and we are a certified NAPA auto care center. Call or come in for immediate service!
When it comes to maintaining the health of your vehicle, few decisions are as crucial as selecting the right type of motor oil. In Oregon’s diverse climate, this decision becomes even more important, as weather conditions can significantly affect your car’s performance. Whether you live in the wet and cool coastal regions or the colder, snowy interior like La Grande, OR, knowing whether synthetic or conventional oil is best suited for your vehicle is essential. This post will help you navigate the differences between synthetic and conventional oil and determine which one is right for your vehicle, especially considering the specific weather conditions in Oregon.
Understanding Synthetic and Conventional Oil
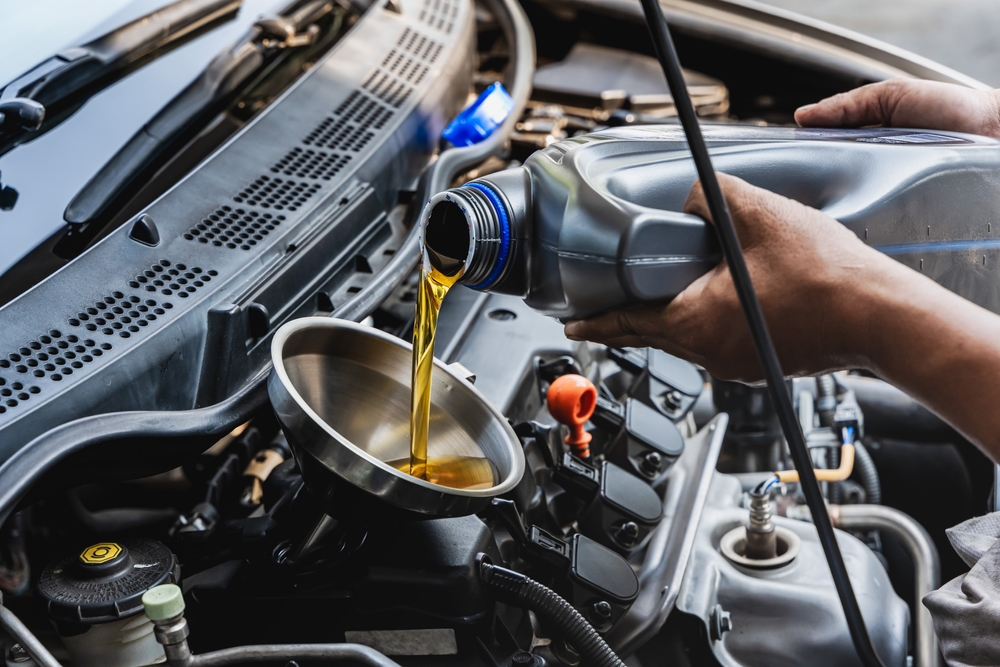
Motor oil plays a vital role in keeping your engine running smoothly. It lubricates the moving parts of your engine, reduces friction, prevents overheating, and helps protect against corrosion. However, not all oils are created equal. Broadly, motor oils fall into two categories: synthetic and conventional.
Conventional oil, also known as regular oil, is derived from crude oil through a refining process. It contains natural hydrocarbons and provides adequate performance for most vehicles in typical driving conditions. On the other hand, synthetic oil is chemically engineered to provide superior performance. It is designed to offer better stability at extreme temperatures, enhanced protection against engine wear, and longer-lasting cleanliness.
The core difference between synthetic and conventional oil lies in the level of refinement and the additives used in their formulation. While conventional oil may be sufficient for some vehicles and driving conditions, synthetic oil tends to outperform conventional oil in various areas, making it an attractive option for drivers in specific climates, like Oregon.
The Impact of Oregon’s Climate on Motor Oil Choices
Oregon’s climate varies drastically depending on your location. From the mild, coastal weather of Portland to the cold, snowy winters of eastern Oregon in places like La Grande, the type of oil you use in your vehicle can be significantly impacted by the environment.
For those living along the coast, temperatures are relatively moderate throughout the year, but there is a lot of rain and humidity. While conventional oil may be sufficient for drivers in this region, synthetic oil offers enhanced protection against moisture and rust, which are common issues in wet climates. The higher resistance of synthetic oil to oxidation and breakdown can be an asset in areas where rain and dampness frequently occur.
In contrast, eastern Oregon experiences colder winters, with temperatures regularly dipping below freezing. Conventional oil tends to thicken in cold temperatures, which can make it harder for your engine to start and cause more wear on engine components. Synthetic oil, on the other hand, remains more fluid at low temperatures, providing better cold-weather performance and helping to prevent engine damage in extremely cold conditions. It also circulates more effectively when the engine is first started, reducing the time it takes for oil to reach critical engine parts.
Benefits of Synthetic Oil in Oregon’s Diverse Conditions
For residents of Oregon, particularly those in areas like La Grande, OR, where temperatures can plummet during the winter, synthetic oil offers a range of advantages. In extreme weather conditions, such as freezing temperatures or intense heat during the summer months, synthetic oil performs better than conventional oil.
One of the primary benefits of synthetic oil is its enhanced ability to withstand temperature extremes. Synthetic oils have a lower pour point, meaning they remain fluid at lower temperatures compared to conventional oils. This makes it much easier to start your engine on a cold morning in the winter, especially when the temperature is well below freezing in the high deserts of Oregon. When your engine starts up more easily, it can avoid the extra wear caused by thick oil, which can lead to unnecessary engine strain.
Additionally, synthetic oil is better equipped to handle the heat generated by the engine, which is essential during the summer months. While conventional oil can break down under high heat, synthetic oil maintains its integrity, providing long-lasting protection for your engine. This makes it a preferred choice for those living in areas of Oregon that experience extreme seasonal fluctuations in temperature.
Synthetic oil also offers longer intervals between oil changes. While traditional oil may need to be changed more frequently—every 3,000 to 5,000 miles—synthetic oil can go up to 7,500 or even 10,000 miles between changes, depending on your vehicle’s requirements. This extended oil change interval is particularly beneficial in regions like Oregon, where the long, cold winters may limit your driving, making fewer oil changes necessary.
Conventional Oil: A Budget-Friendly Option for Mild Conditions
While synthetic oil is often considered superior, conventional oil is still a viable option for many drivers, especially in milder conditions. If you live in areas of Oregon where temperatures are relatively moderate year-round, conventional oil can provide adequate protection and performance for your vehicle.
One of the main advantages of conventional oil is its lower cost compared to synthetic oil. If you are on a budget or simply don’t require the high-performance benefits of synthetic oil, conventional oil might be the right choice for your vehicle. Conventional oil is a great option for those driving vehicles that are older or not subjected to extreme driving conditions.
However, drivers in more extreme climates, such as those in La Grande, OR, or other high-elevation regions, may find that conventional oil doesn’t provide the level of protection they need during the cold winters or hot summers. In these cases, it may be wise to consider switching to synthetic oil for improved engine performance.
Oil Changes in La Grande, Oregon: What You Need to Know
No matter which type of oil you choose for your vehicle, regular oil changes are an essential part of car maintenance. In La Grande, OR, where temperatures can range from frigid winters to warm summers, it’s important to adhere to a regular oil change schedule to ensure your vehicle runs smoothly year-round.
If you’re unsure whether synthetic or conventional oil is right for your car, it’s a good idea to consult a local mechanic in La Grande, OR, who can evaluate your driving habits, vehicle type, and the weather conditions in your area. They can recommend the best oil for Oregon’s weather, taking into account how often you drive, the types of roads you travel, and the specific conditions in which your vehicle operates.
When it comes to the frequency of oil changes, it’s essential to follow your vehicle manufacturer’s guidelines. This typically means changing your oil every 3,000 to 7,500 miles, depending on the type of oil used. For synthetic oil, the interval is usually longer, as mentioned earlier, but it’s crucial to ensure that your oil is still functioning effectively, particularly in colder climates where the oil can degrade faster due to condensation and moisture.
Finding a reliable service for oil changes in La Grande, Oregon, is essential for keeping your vehicle in top shape. Many auto shops in the area offer both synthetic and conventional oil changes, so you can choose the right option for your needs. Whether you’re looking for convenience or performance, the right oil change service can ensure your vehicle runs smoothly through all of Oregon’s unpredictable weather conditions.
Which Oil is Right for You?
Choosing between synthetic oil vs conventional oil depends on various factors, including your vehicle’s needs and the specific climate you live in. Oregon’s diverse weather conditions—from the cold winters of La Grande to the wet, mild coastal regions—make it important to consider how the oil will perform in these conditions.
Synthetic oil provides superior performance in extreme temperatures, reduces engine wear, and offers longer oil change intervals. If you live in areas of Oregon with harsh winters or experience significant temperature fluctuations, synthetic oil might be the best choice for your vehicle. On the other hand, if you drive an older vehicle in milder conditions and are looking for a more budget-friendly option, conventional oil can still offer reliable performance.
Ultimately, the best oil for Oregon weather will depend on your driving habits, the condition of your vehicle, and your budget. No matter which option you choose, remember that regular oil changes are crucial for maintaining the health and longevity of your engine, so make sure to follow a regular maintenance schedule to keep your vehicle in optimal condition.
Need a Mechanic in La Grande, OR?
Our team here at Integrity Automotive has provided quality auto repair services for our customers since 2003. We are a full service auto repair shop and specialize many types of vehicles, including European models such as BMW and Audi, as well as diesel trucks. Our services include engine repair, transmission services, and many more services. Moreover, we are ASE certified and are a proud member of NFIB, and we are a certified NAPA auto care center. Call or come in for immediate service!
Auto tune-ups are essential for maintaining the performance and longevity of your vehicle, ensuring it runs smoothly and reliably. In La Grande, OR, where the weather can be unpredictable, your car undergoes various stressors, including extreme temperatures and sometimes rugged terrains. Understanding how often you should get an auto tune-up in La Grande, OR, is crucial for avoiding costly repairs and ensuring your car is always ready for the road. This blog will dive into the importance of auto tune-ups, the factors affecting how often you need them, and why they matter for your vehicle’s overall health.
The Importance of Regular Auto Tune Ups in La Grande, OR
A regular auto tune-up is more than just a routine check-up; it is a proactive way to ensure your car is operating at peak performance. Over time, parts of your car’s engine, exhaust system, and fuel system can degrade, leading to reduced efficiency and potential breakdowns. Regular maintenance helps catch minor issues before they evolve into significant problems, saving you money and ensuring your car stays dependable. In La Grande, OR, where temperatures fluctuate and driving conditions vary, these tune-ups are particularly vital to safeguard your car against the wear and tear specific to the area.
The weather in La Grande can be harsh, with cold winters and hot summers. These extreme conditions can cause strain on certain components of your vehicle, such as the battery, engine, and tires. An auto tune-up ensures that these components are functioning as they should, helping you avoid surprises during a cold morning start or a long summer drive. Additionally, La Grande’s hilly terrain and winding roads can put extra strain on your car’s transmission and brakes. Ensuring that your vehicle is tuned up regularly in this environment is a smart way to enhance safety, reliability, and performance.
How Often Should You Get an Auto Tune Up in La Grande, OR?
The frequency of auto tune-ups depends on several factors, including your car’s make and model, how much you drive, and the type of driving you do. Generally, most vehicles require a tune-up every 30,000 to 100,000 miles, with older vehicles requiring them more often. However, the driving conditions in La Grande, OR, may influence this range. For example, if you frequently drive on hilly roads or in severe weather, you might need tune-ups more frequently to account for the added strain on your vehicle’s components.
Manufacturers often provide guidelines for when to schedule your vehicle’s next tune-up in the owner’s manual. The service intervals can vary by vehicle type, with some newer models needing fewer tune-ups due to advanced technology that makes parts more durable. However, even with these newer cars, there are key signs that suggest it’s time for a tune-up. These include decreased engine performance, strange noises, or warning lights on your dashboard. If you live in La Grande, OR, where roads are sometimes less predictable, paying attention to these signs and scheduling a tune-up as needed can prevent unexpected failures, especially in harsh weather conditions.
Key Components Checked During an Auto Tune Up
During an auto tune-up, a variety of components are inspected and serviced to ensure your car operates optimally. The most common areas of focus include the engine, spark plugs, air filters, fuel filters, and the ignition system. In La Grande, OR, the cold winters and hot summers can put additional stress on your vehicle’s engine and exhaust system, so checking these parts regularly is essential.
Spark plugs are crucial for proper engine operation. Over time, they can become worn or corroded, leading to poor fuel efficiency and engine misfires. Air filters help ensure that your engine gets clean air, improving overall performance. If the air filter becomes clogged, it can reduce the engine’s efficiency, leading to decreased power and fuel economy. Fuel filters are another essential component; they prevent dirt and debris from entering the engine, which can cause serious damage if left unchecked. Lastly, the ignition system, which includes the spark plugs, coils, and wires, is responsible for starting your engine and keeping it running smoothly. Ensuring these components are in good condition is particularly important in La Grande, OR, as freezing temperatures can strain the ignition system.
Signs That Indicate It’s Time for an Auto Tune Up in La Grande, OR
Knowing when to schedule an auto tune-up in La Grande, OR, goes beyond simply following manufacturer recommendations. Certain signs indicate that your vehicle may need immediate attention. If you experience a noticeable decrease in engine performance, such as rough idling, stalling, or difficulty starting, it could be a sign that your car is due for a tune-up. These issues often stem from the ignition system, air filter, or fuel system, which can be easily addressed during a tune-up.
Unusual noises coming from your engine are another red flag. A misfiring engine can produce sputtering or backfiring sounds, signaling the need for immediate attention. If you notice that your car is burning through fuel more quickly than usual, a tune-up could help restore optimal fuel efficiency by ensuring that your engine and fuel system are functioning properly. Also, if your check engine light comes on, it may be an indication of an issue with one of your vehicle’s components, making it important to get your car tuned up to avoid further damage.
Finally, for residents of La Grande, OR, another sign that a tune-up is needed is poor performance in extreme weather conditions. In the colder months, for instance, your car may struggle to start or may run inefficiently due to issues with the battery, spark plugs, or fuel system. A tune-up can address these issues before the winter weather makes them worse, ensuring that your vehicle remains reliable no matter the temperature.
Benefits of Timely Auto Tune Ups in La Grande, OR
The benefits of getting timely auto tune-ups in La Grande, OR, extend far beyond avoiding costly repairs. First and foremost, regular tune-ups can greatly improve your vehicle’s fuel efficiency. A well-maintained engine burns fuel more efficiently, which can save you money on gas. For those living in La Grande, OR, where gas prices can fluctuate, this can be especially important, as even small improvements in fuel economy can make a significant difference in your budget over time.
Additionally, regular tune-ups contribute to your car’s overall reliability. Whether you’re commuting to work, running errands, or taking a road trip, a well-maintained vehicle is less likely to break down unexpectedly. This peace of mind is invaluable, particularly when living in a town like La Grande, OR, where long stretches of road can separate you from the nearest mechanic. By keeping your car in good condition, you reduce the chances of being stranded on the side of the road.
Regular auto tune-ups also contribute to a longer vehicle lifespan. Just like any machine, your car needs proper care to run smoothly for years. By catching issues early on and addressing them through regular tune-ups, you can extend the life of your car and avoid the expense of premature replacement. This is especially true in La Grande, OR, where the local climate can put added stress on your vehicle, making it essential to keep up with maintenance to prolong its useful life.
Conclusion
Getting an auto tune-up in La Grande, OR, is a crucial part of maintaining your vehicle’s health. While the general recommendation is to have a tune-up every 30,000 to 100,000 miles, it’s important to consider factors such as your car’s make, model, driving habits, and the unique conditions in La Grande. By staying on top of regular maintenance and addressing warning signs promptly, you can keep your car running smoothly, save money on repairs, and ensure its reliability for years to come.
Need a Mechanic in La Grande, OR?
Our team here at Integrity Automotive has provided quality auto repair services for our customers since 2003. We are a full service auto repair shop and specialize many types of vehicles, including European models such as BMW and Audi, as well as diesel trucks. Our services include engine repair, transmission services, and many more services. Moreover, we are ASE certified and are a proud member of NFIB, and we are a certified NAPA auto care center. Call or come in for immediate service!
The suspension system in your vehicle plays a critical role in ensuring a smooth and safe ride. It’s easy to take the system for granted until something goes wrong. For residents of La Grande, OR, understanding the signs of suspension system issues can help prevent further damage and ensure the safety of your travels.
What Is the Suspension System?
Before diving into the signs of suspension system issues in La Grande, OR, it’s essential to understand what the suspension system does and why it’s vital.
Purpose of the Suspension System
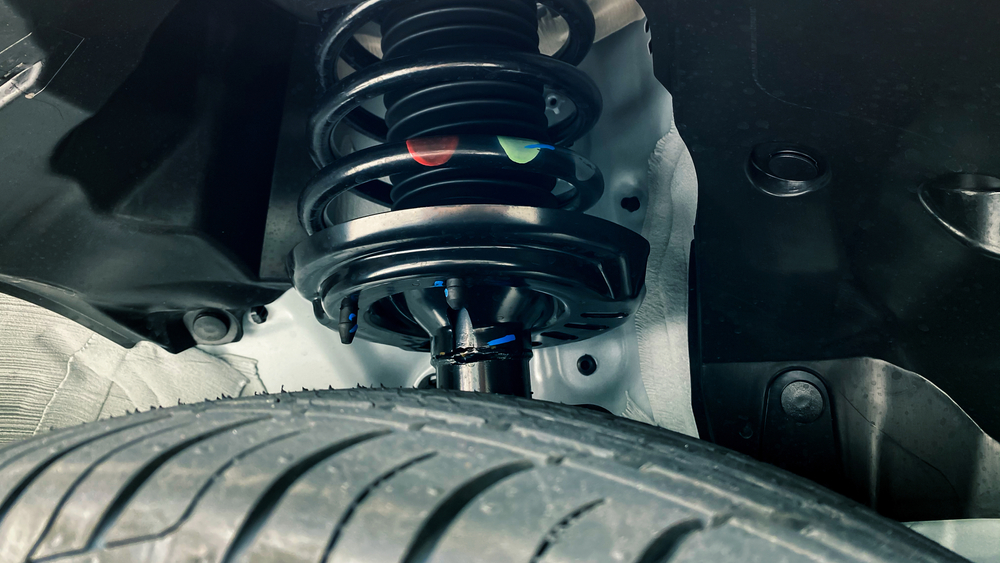
The suspension system connects your vehicle’s wheels to its frame and absorbs shocks from the road. It ensures that your tires maintain proper contact with the ground, offering stability, control, and comfort while driving.
Key Components of the Suspension System
Springs: These absorb the energy from bumps and dips in the road.
Shocks and Struts: These work with the springs to dampen the impact.
Control Arms: These connect the wheels to the frame and manage movement.
Bushings and Joints: These reduce friction and allow smooth movement between parts.
Anti-Sway Bars: These help minimize body roll during turns.
Common Signs of Suspension System Issues
Spotting suspension system issues early can save you time, money, and frustration. Here are the most common signs to watch for:
Uneven Tire Wear
One of the first signs of suspension system issues in La Grande, OR, is uneven tire wear. When the suspension system isn’t functioning correctly, it can cause improper alignment or uneven pressure distribution on the tires. Check your tires regularly for:
Bald spots
Uneven tread depth
Excessive wear on one side
If you notice these issues, it’s time to have your suspension system inspected.
Bumpy or Rough Ride
A properly functioning suspension system absorbs shocks from the road, making your ride smooth and comfortable. If you begin to feel every bump and pothole, your shocks or struts may be worn out. This is especially noticeable on La Grande’s rural and uneven roads.
Nose Diving or Rear Squatting
When your vehicle dips forward during braking or squats backward during acceleration, it’s a clear sign of suspension problems. This could indicate worn-out shocks or struts that can’t handle the vehicle’s weight effectively.
Pulling to One Side
If your car drifts or pulls to one side while driving, it could mean:
Misaligned wheels
Worn control arms or bushings
Damaged springs
Ignoring this issue can lead to more severe problems, including reduced control and increased tire wear.
Steering Difficulties
Suspension system issues in La Grande, OR, often manifest as steering problems. If you experience:
Difficulty turning the wheel
A loose or “sloppy” steering feel
Vibrations in the steering wheel
These symptoms could point to suspension issues or other related problems.
Clunking or Knocking Noises
Unusual noises like clunking, knocking, or squeaking when driving over bumps or making turns are common signs of suspension system issues. These noises may indicate:
Worn-out bushings
Loose components
Failing shocks or struts
Sagging or Uneven Vehicle Height
If one corner of your vehicle sits lower than the others, it’s a sign of a broken or weakened spring. This issue can affect your vehicle’s balance and handling, making it unsafe to drive.
Fluid Leaks
Shocks and struts are filled with fluid to absorb road impacts. If you notice oil or fluid leaks near your tires, your shocks or struts might be damaged and in need of replacement.
Causes of Suspension System Issues
Understanding the root causes of suspension system issues can help prevent them. Here are some common reasons:
Poor Road Conditions
The roads in and around La Grande, OR, can be rough, especially during winter or after heavy rain. Potholes, gravel roads, and uneven surfaces put extra strain on your suspension system.
Normal Wear and Tear
Like any mechanical system, the suspension system deteriorates over time. Regular maintenance can help extend its lifespan, but components like shocks, struts, and bushings will eventually need replacement.
Overloading
Carrying heavy loads beyond your vehicle’s capacity can stress the suspension system, leading to premature wear and damage.
Lack of Maintenance
Failing to address minor issues, such as alignment problems or worn bushings, can lead to more significant suspension problems.
Importance of Timely Repairs
Ignoring suspension system issues can lead to:
Increased tire wear
Reduced fuel efficiency
Poor handling and safety risks
Costly repairs due to further damage
Addressing these problems promptly ensures your vehicle remains safe and efficient.
Professional Suspension System Inspection in La Grande, OR
If you suspect suspension system issues in La Grande, OR, it’s crucial to consult a professional mechanic. A qualified technician will:
Perform a thorough inspection
Diagnose the root cause of the issue
Recommend necessary repairs or replacements
How to Prevent Suspension System Issues
Preventative maintenance can save you from costly repairs and unsafe driving conditions. Follow these tips:
Regular Inspections
Schedule routine inspections with a trusted mechanic in La Grande, OR. They can identify potential problems before they become severe.
Avoid Rough Roads
When possible, steer clear of potholes and uneven surfaces. Drive carefully on rough roads to minimize stress on your suspension system.
Maintain Proper Tire Pressure
Keeping your tires inflated to the recommended pressure reduces stress on your suspension components and ensures even tire wear.
Address Issues Immediately
Don’t ignore the signs of suspension system issues. Prompt repairs can prevent minor problems from escalating.
Finding the Right Mechanic in La Grande, OR
When dealing with suspension system issues in La Grande, OR, it’s essential to choose a reliable mechanic. Look for:
Certifications and experience
Positive customer reviews
Transparent pricing
A local expert familiar with La Grande’s unique road conditions can provide the best service and advice.
Conclusion
Suspension system issues in La Grande, OR, can compromise your vehicle’s safety and performance. Recognizing the signs, understanding the causes, and addressing problems promptly are crucial steps in maintaining your vehicle. With regular inspections and preventative care, you can keep your suspension system in excellent condition and enjoy smooth, worry-free drives in and around La Grande.
Need a Mechanic in La Grande, OR?
Our team here at Integrity Automotive has provided quality auto repair services for our customers since 2003. We are a full service auto repair shop and specialize many types of vehicles, including European models such as BMW and Audi, as well as diesel trucks. Our services include engine repair, transmission services, and many more services. Moreover, we are ASE certified and are a proud member of NFIB, and we are a certified NAPA auto care center. Call or come in for immediate service!